Find the SQL Server Management Studio (SSMS) icon and click to open.
Detail 1: Find the SQL Server Management Studio icon and click to open. Clicking the icon will open a connection window.
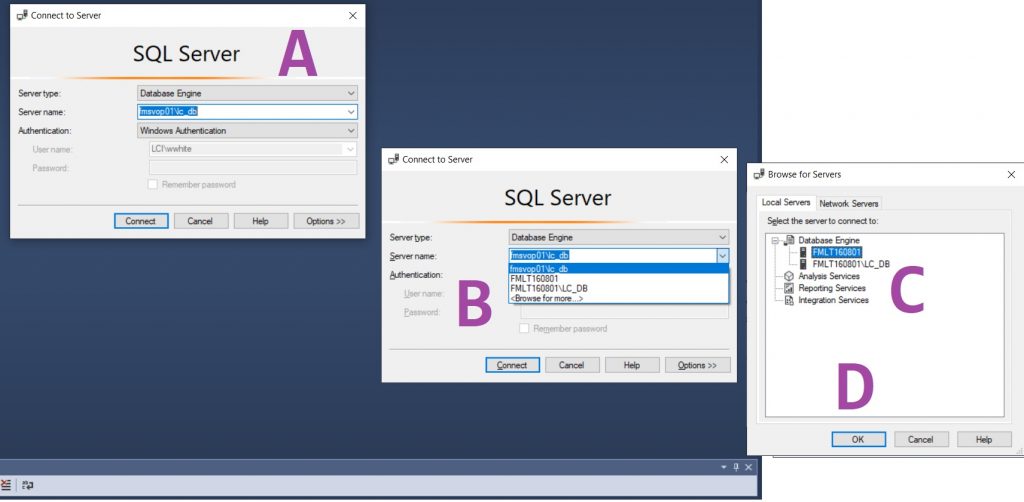
Detail 2: Clicking the icon will open a connection window (A). With the SSMS Connection window, if there are no databases attached, click (B) on the down-pennant to expand, then select Bourse if this is the first-time use or additional databases are to be connected. After the databases have been found, then select the database to be used. In my case, I will be using the database LC_DB in following examples. But here, the FMLT160801, local machine’s (C) installed SQL database, will be selected. The (D) click the OK button.
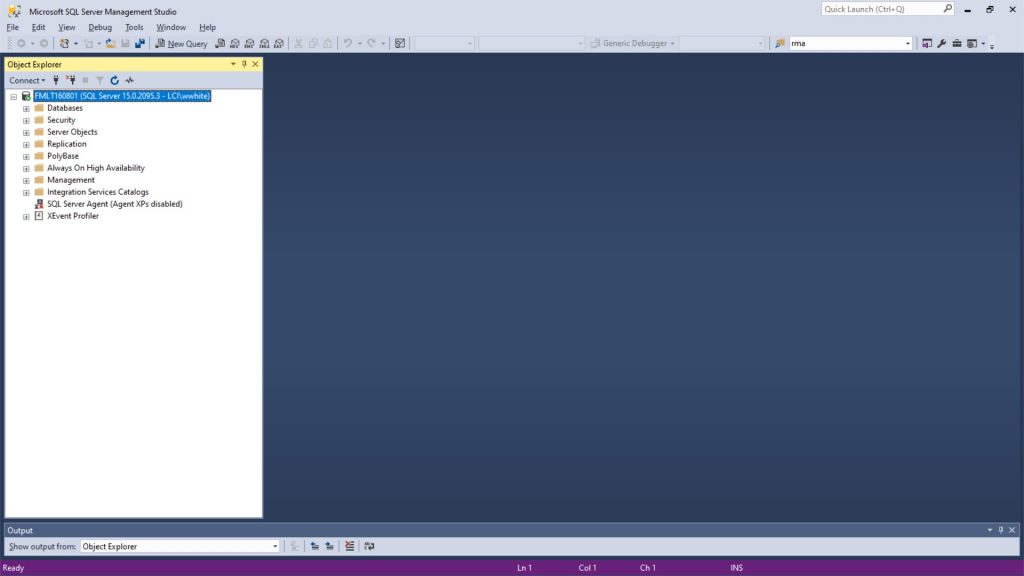
Detail 3: After selecting the local machine’s installed SQL database, the window will display in initial view shown on startup.
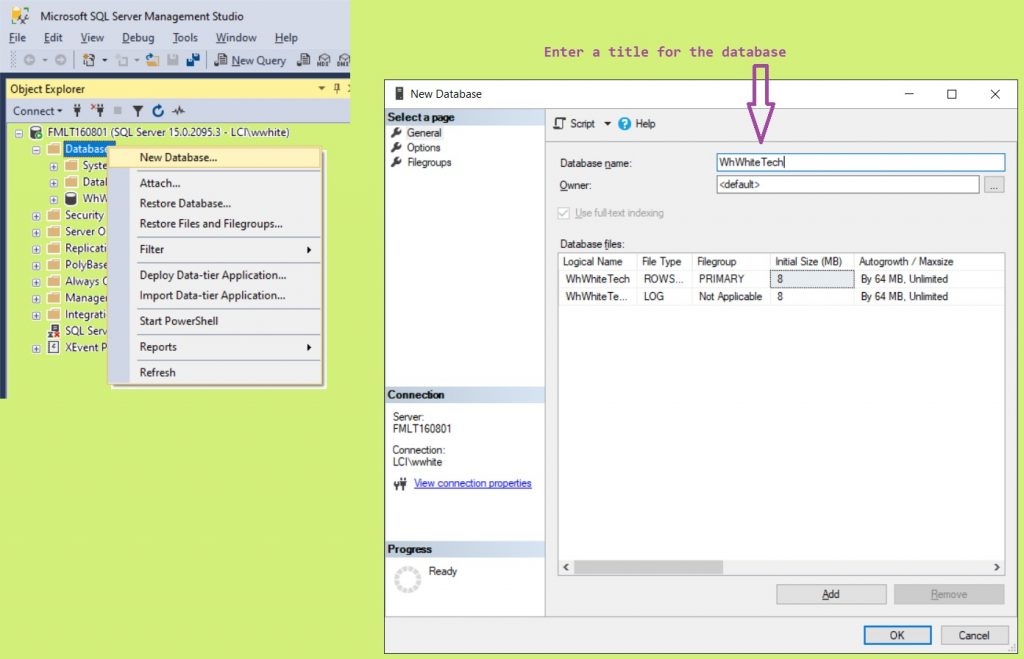
In Detail 4 Object Explorer tree, perform a right click on Database branch and select New Database. In the New Database window, enter the database name and click on the OK button. The same process will be done if the database is on a network server.
Herein is the general routine used to establish a named database through the SSMS. Once a database is established, then start developing the tables.